Monday, May 6, 2019

tplinkwifi.net : How to configure the Access Control list in tp link 1900 ACS router?

Access Control list is the smart way to keep control of all the devices connected to your network. Access control is used to block or allow all the specific devices within the network. This feature provides the authority to the user to categorize the users in a manner, with the help of which he can easily recognize the device he wants to allow or block from accessing the network. The user can access this list using the web interface of the device which is 
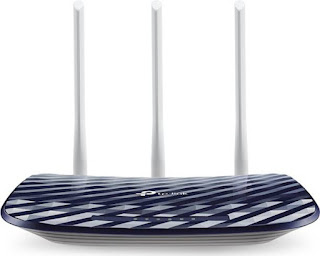
interacted by visiting the TP Link router login page. The login page of Tp link is visited by typing www.tplinkwifi.net on the address bar of the browser.

List of Access Control is divided into two parts


Blacklist- This category represents the devices which are blocked by the main user in order to keep the users away from connecting with the network
White list- The devices fall in this category are the devices which are allowed by the main user to get connected to the network.


Steps to configure Access Control list in Tp-link 1900 AC router


·         Launch a browser with the URL www.tplinkwifi.net on the address bar. The user can also type 192.168.1.1 on the address bar to interact with the default gateway of the router.
·         As soon as you enter, Tp link router login page is going to appear on the screen.
·         Mention “admin” on the username field and type “password” as the default password on the password field. Click on the login button for landing on the web menu dashboard of tplinkwifi.net
·         Go to the advanced tab, then security tab and at last click on the Access Control tab.
·         Access Control page will appear on the screen.
·         To trigger the Access control feature slide the bar to the right.
·         Now, if the user wants to block the devices then select the blacklist bar and if the user wants to allow the specific devices then select the White list bar.
·         Choose any one option and then you need to select the list of device you want to keep in the mentioned option.
·         The selected devices will get listed in a row in the chosen option.
When you are done with choosing all kinds of options and performing all types of configurations you want to perform, then you can click on the OK tab and all the changes will get saved.

Wednesday, February 6, 2019

How can I increase the wifi signal range of my TP-link router?

If the users are using the TP-link wireless routers, then they can be configured through tplinkwifi.net. These webs address www.tplinkwifi.net and the default IP 192.168.1.1 or 192.168.0.1 can both be used for accessing the admin setup page of the TP-link router.


This question is asked a number of times as how to increase the wifi signal connectivity of the TP-link router. Well, there are some simple ways that can help you increase the wifi strength of your TP-Link router. These simple hacks have been listed below.

1.     Make sure that your TP-link wireless router is placed at an optimum position in your home or office.
2.     There should be no physical or even virtual hindrances in between your TP-link router and the connecting device.
3.     Always try to keep the firmware of your TP-link router updated. Also, it is recommended that the TP-link router’s firmware should be updated as soon as possible after its release.
4.     There should be no electrical or electronic radio wave emitting devices near your wireless router as these devices can interfere in each other’s wireless cover resulting in the lowered wifi signal connectivity.

What should we do if the wifi signal coverage of the router is extremely poor?
In case your existing wireless router tends to deliver the poorest wireless signals and in turn creating a large number of dead zones, then what you need to do is add a wifi extender from TP link to your existing wireless router.

Here is how you can set up a TP-link range repeater with your existing wireless router.

Tp-link range repeater setup- The TP-link range repeater can be set up with your existing wireless router through one of the three available methods. These methods are listed below.

v WPS connection (Push n Connect)
v Ethernet cable connection
v Wifi connection

WPS connection- The WPS stands for wifi protected connection that means it is a safe and secure wireless connection method. The user just needs to press the WPS button given on the router’s body and then select the WPS connection option in the internet and settings section of their computer device or vice versa.

Important- Note that the WPS connection works only with the wireless networks that support the WPA/WPA2/WPSK and above security types, WPS connection doesn’t support the WEP security keys.

Ethernet cable connection- Ethernet cable connection is the most convenient wired connection method. The Ethernet cable should be of RJ45 type and the modem should be connected into the WAN port and the computer system to the router’s LAN port.

Tuesday, December 18, 2018

tplinkwifi.net : Tp link wireless router password reset

TP-Link wireless routers are one of the most advanced sets of networking devices. TP-link devices are not only very high-end devices loaded with some extraordinary features but it is also very easy to use and even configure. The web address www.tplinkwifi.net has proven to be of great use when it comes to access the Tp-link wireless router’s setup page for configuration and further modification purposes. The users are required to perform this basic setup of configuration on their devices so that it can be used for networking and internet services.


What to do if I forget the router admin login password?


There is absolutely no need of rushing to any unnecessary action on your Tplink wireless router, what you need to do is just read the troubleshooting steps listed below in order to get your router password reset. If you have forgotten your router’s login password, then you must have to get your Tplink wireless router reset to its original factory settings.

There are basically two methods of getting your Tplink wireless router reset to its original state. These are mentioned are below.
  • Router reset through the reset button on the router
  • Reset through the web interface of the router

                      (tplinkwifi.net)

Reset through the reset button of the router


The Tplink wireless router can be reset to its original factory state easily through the reset button given on the outer body. What you need to do is just follow the steps mentioned below.
1.     Switch on the power supply and keep it awake and stable.’
2.     Now insert a long pinpointed object like a paper clip or a pin and push the reset button. Push and hold the reset button pushed for at least 5- 10 seconds.
3.     Your router device will take a reboot itself and you can release the reset button now and wait for it to get stable again.
4.     Till now, all the settings written on your router’s memory will be erased and you will have to configure it again to get it in a working state.

Important – As your Tplink wireless router device has been reset, so as all the details on it also has been erased. The router device will be rebooted to a whole new device.
*    Users can easily set a new password for logging into its setup page.
*    Just use the default login credentials for accessing its setup page. The default login password is “password” respectively.
*    Access the Wireless security section of the router’s firmware and then provide the old password once and the new password twice to confirm and set the new password.

Friday, November 30, 2018

tplinkwifi.net | TP-Link router login and setup via through www.tplinkwifi.net

TP-Link has been on the top of its other competitor brands when it comes to producing reliable and comparatively fast networking device. TP-Link manufactures the various networking devices like routers, modems and range extenders etc.  There is quite a useful web address for accessing the setup home page of these devices i.e. www.tplinkwifi.net and then authorize your access with a username and password.


TP-Link Wi-Fi router setup


The TP-Link wireless router setup is necessary as, without the primary configuration of the router, it will be completely useless, so it is recommended that the router should be configured with the required settings. Follow the below mentioned steps in order to get your router configured in some easy steps.
  • Connect the modem to the Internet port or the router and connect your computer system to one of the several LAN ports available on the router.
  • Connect the power cord to the router device and switch the power on. Wait for few seconds or until the indicator LEDs on the panel turn solid green or amber.
  • Now, open the web browser in which you will need to input the TP-Link’s web address www.tplinkwifi.net and then authorize the access with a username and password.
  • Now select the proper connection type from the Internet and settings section and fill in the rest of the details like the username and password provided by your Internet service providers.
  • Follow the rest of the instructions on the screen to complete the router setup process.
  • Click the save and apply changes button to lock all of your settings written on the router. Then select reboot now tabs to make all the changes effective on the router hardware.


Wednesday, October 17, 2018

Tplink router login setup & setting - tplinkwifi net - tplinkwifi.net login


The TP-Link WiFi Setup is one of the easiest things to do if the user has started off with the official thing of performing things that are needed by the device. The http://tplinkwifi.net setup procedure is important thing to do if the user wants to set the whole thing up without facing any kind of hassles or problems. Once the person has started off with changing the inner configuration settings, it becomes very clear for the user to go through the proper procedure to do something like this. To start off with changing the inner settings of this TP-Link Router, the user might have to go to the main site before going anywhere else. The TP-Link WiFi Router setup is very easy to perform and get used to as most of the instructions are very well written and the company has used extremely easy English in creating something like this. To get started with the TP-Link WiFi Router Setup procedure, look below.

  • The first thing to do is to go to your TP-LinkRouter and turning it on.
  • Then, you need to turn on a computer or a laptop as well.
  • After you have done that, you would be required to launch a web browser application.
  •  In this web browser, go to the URL bar and type in the website http://tplinkwifi.net.
  • Here you will encounter a simple http://tplinkwifi.net setup procedure that can be completed in order to set the whole device up.
  • Once this thing is also complete, you would be able to enjoy the whole device’s functionality.


Monday, September 10, 2018

TP-Link wireless router setup through tplinkwifi.net | TP-link router setup


TP-Link provides such a wide variety of products to the customers that it has now became hard to even keep a list of them. This is being done by the company to keep releasing refreshing and up to date products. This has helped a lot to those people who can’t waste money on the old products which are rarely updated in spite of being released by a company with such a good reputation. This has made everything so easy to do that people have started to buy new and updated routers just so they don’t have to remember all those peculiar details about random stuff which can be just avoided if the person chooses to buy the latest and well furnished product. To look more into these things, we will be looking at how one can reset a TP-Link WiFi Router without spending much time hassling with the peculiar things. Let us get started with how the process of resetting a TP-Link router works.


  •  First things first, you need to turn on the TP-Link router so we can start the process.
  •  Also turn on the personal computer that you use for your own use.
  • Then, go to your computer and then click on the Desktop. Open your web browser.
  • Go to the website http://tplinkwifi.net.
  •  After that, enter the username and the password to enter your router settings.
  • When this is done, you will be seeing a new interface on your screen.
  • Go towards the left side of your interface and search for the System Tools option.
  • Click on it.
  • Then, click on the Backup & Restore menu item.
  • After that is done, select Factory Reset option and click Restart.
  • This is all you need to do to factory reset your TP-Link WiFi Router. This reset process should be complete in just a few minutes. After that, you can setup your router again and start using it.  


Tuesday, August 14, 2018

How to set up a TP-link TL-941HP | tplinkwifi.net | tplink router login

Tplinkwifi net


TP-link is the name of one of the biggest established companies in the world. This company has not only been employing countless employees, but also has set up a base in almost all the countries for the network products that it produces. However, it is not only TP-link that makes one of the best products; other companies like Netgear, Dlink and AmpWireless are also famous for these things. At the rock bottom, these companies that fight for the bigger share in market is ultimately a good things for the customer since it makes things cheaper and also forces the companies to better up their services. Today, we’ll be looking at how to set up a TP-link router and the model we would be using is TL-941HP. This model not only provides extreme speeds at low cost of manufacture, but also gives additional benefits like improved Wi-Fi range (especially in http://tplinkwifi.net), higher security implementation and of course, an amazing interface!


  1. Make sure the adapter is connected to the router and the wall socket.
  2. Plug in the Ethernet wire into the router, and the other into the computer.
  3. After this, turn on your computer and the router so that power can flow freely into the devices.
  4. After the desktop is loaded in the computer, click on the Web Browser to let it open.
  5.          When the Web Browser opens up, open the below website for straight access to the router:

  6.           After the website opens up, it will ask you to input your desired username and password to login to when opening the router interface. Don’t worry, even if you don’t know what to type, enter the above combination of usernames and passwords so you can keep a track of what credentials you entered:
Username: admin
Password: password

OR

Username: admin
Password: admin
     
                7.  When you fill this up, you will be taken to the next screen. When you finish landing there, click           on Settings tab and open Wireless sub tab from the left-handed menu.

          8.  Finally, enter the details you want for the Wireless Network (Wi-Fi Network). After filling it                up, click Save.

       Let the router and the computer restart after the previous operation. This will ensure that everything   is saved and runs smoothly in the future!